Note Tracker Template 2.0 User Guide
Introduction
The Note Tracker Template 2.0 added new features such as the data connection from the TOSA to Note Tracker and the auto-generated introductory language and notes placement XML tags.
It aims to reduce the following:
- Manual transfer of data from the TOSA to Note Tracker
- Manual writing of introductory language
- Manual transfer of written notes from Note Tracker to Note Creator / EDEN Editor
In order to achieve the following:
- More accurate data and output
- Faster processing time
- Less manual tasks for POCs and editors
You will need to set up the following:
Get started
Download the template from the Menu, under CI Projects, select Note Tracker Template 2.0 then click the download button.
Or you can download it from here:
Download TemplateOr copy this link to your browser's address bar:
CopyClick to enlarge
Sheets
The default sheets available in this template are the following:
- XML - contains the XML tags for notes placement; hidden by default
- Summary - contains a summary of note writing-related tasks
- Note Tracker - the main repository for written notes
Columns
If one of the default columns is not needed for your respective jurisdiction, you can:
- Hide the column
- Rename and reuse the column
Heads up! Do not transfer an existing column to an unused column. (e.g. Transferring the Effective Date column to column H - Extra.) That might cause problems with the formulas.
The column H - Extra column is an extra column that can be reused.
Before adding a new column, see if there's an unused column you can reuse. If none is available, start in column Q.
- A. Session
- B. HB/SB
- C. Act Chap
- D. Act Sec
- E. Effect
- F. Effective Date
- G. Normcite
- H. Extra
- I. Intro Language
- J. Note Text
- K. Note Writer
- L. Date
- M. Validated
- N. Note Placed
- O. Date Placed
- P. XML-Notes
Formulas
The formulas you need to add are the following:
- Introductory language for cell I2
- Notes Placement XML tags for cell P2
To easily apply the formula to an entire column, you can do any of the following:
- drag the fill handle to as many rows as possible
- double click the fill handle (this won't work if adjacent cells are blank)
- press the following shortcut keys:
- Click on cell I2 or P2
- Ctrl + C
- Ctrl + Shift +
- Ctrl + V
Check the formula bar to verify if the formula is applied correctly.
For example, this is the content of cell I2:
If you click on cell I3, it should be
Notice that $A$2 didn't change. That's because it's an absolute value and a reference to the session year in cell A2.
Session Year
The session year in A2 determines the year that would be generated in the auto-generated intro language.
Be sure to replace the default 2022 for succeeding years.
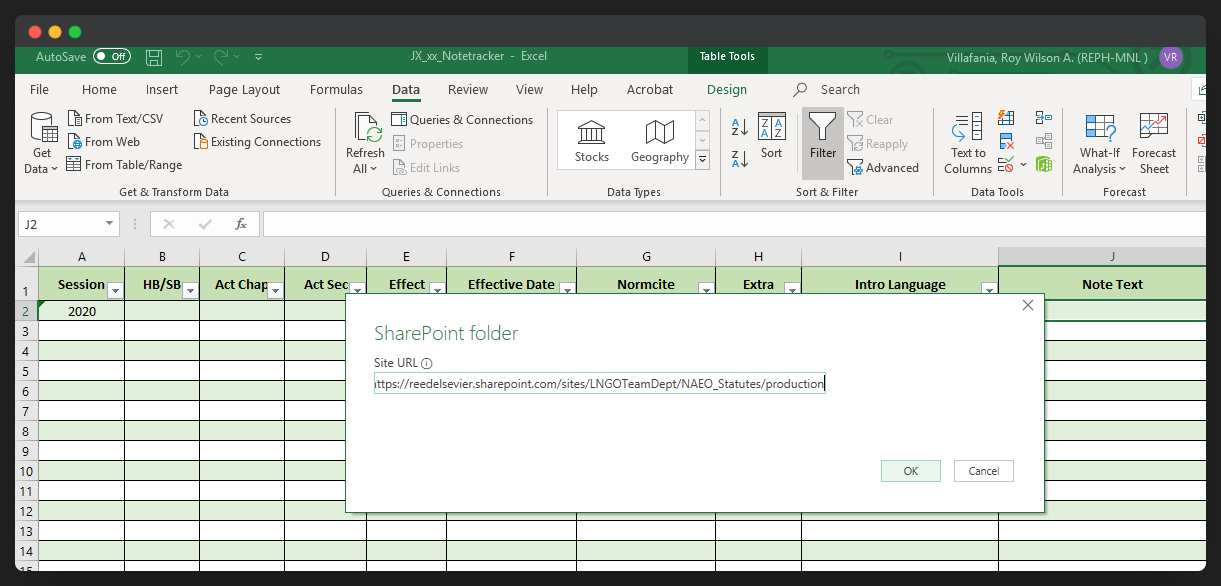
Before getting started, make sure that the source document (TOSA) is uploaded to the Sharepoint folder. We won’t be able to establish the data connection if the source document is not in the Sharepoint folder.
From the JX Note Tracker template, see below steps:
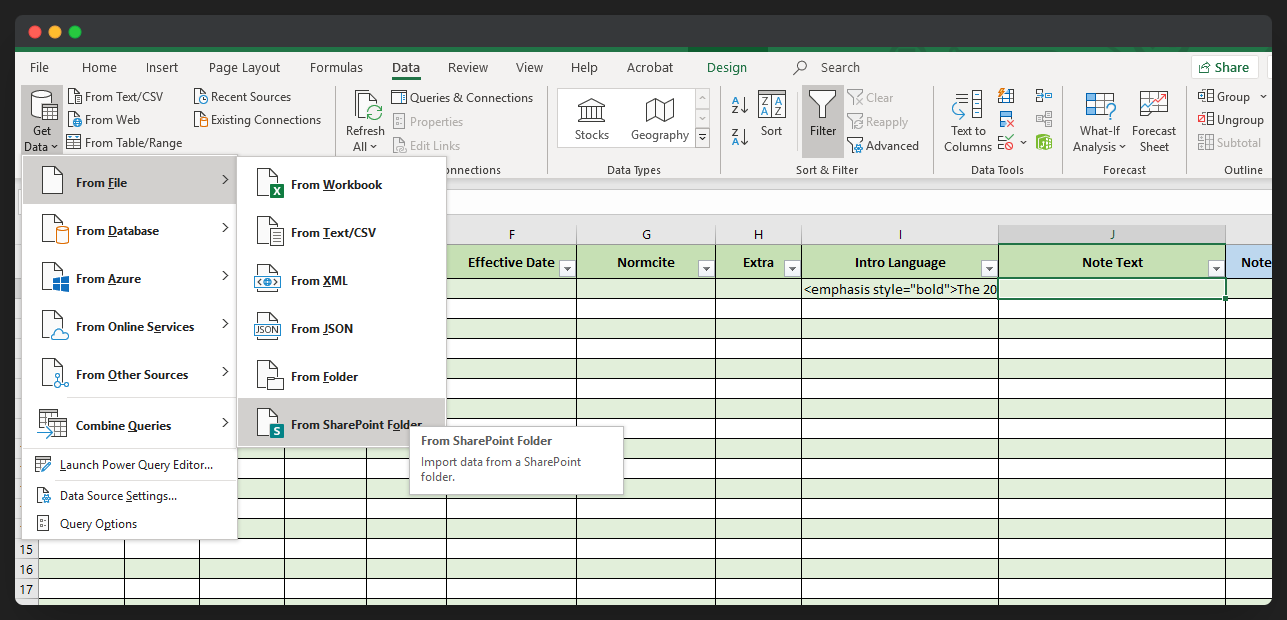
Step 1.
Click Get Data->From File->From Sharepoint Folder.
Click to enlarge
Click to enlarge
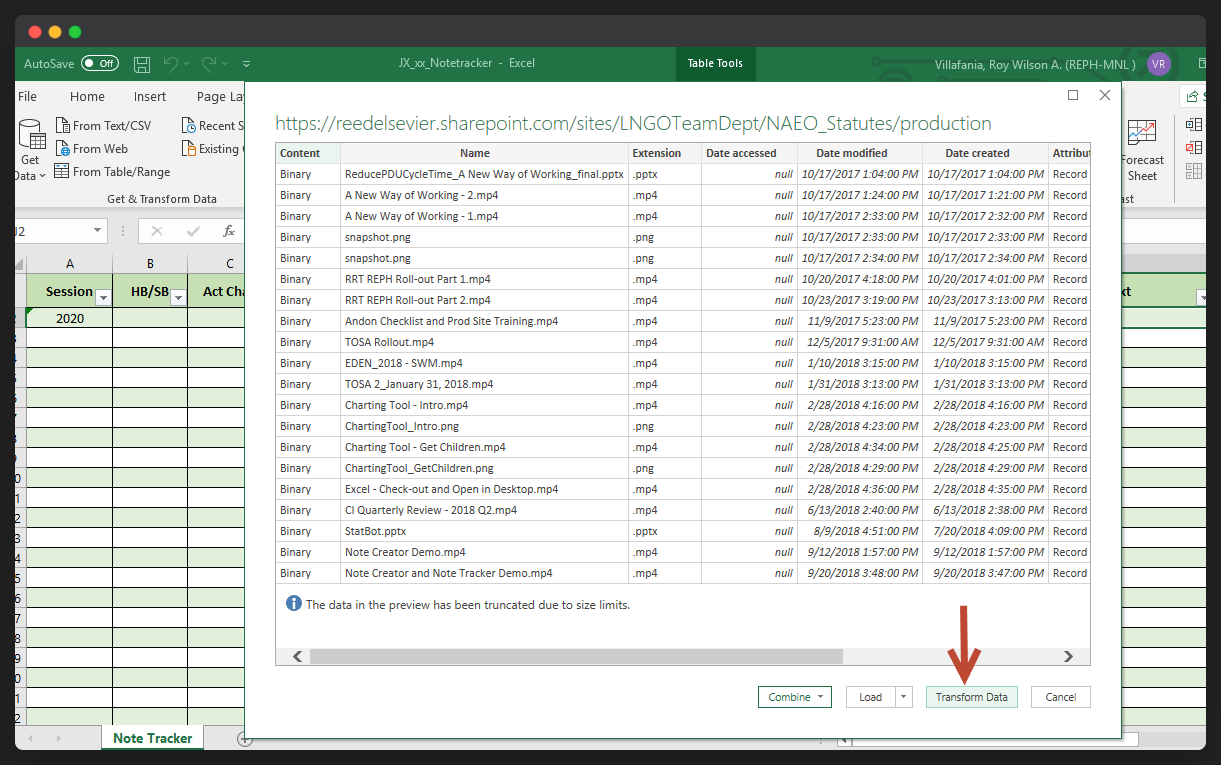
Step 3.
Click Transform Data.
Click to enlarge
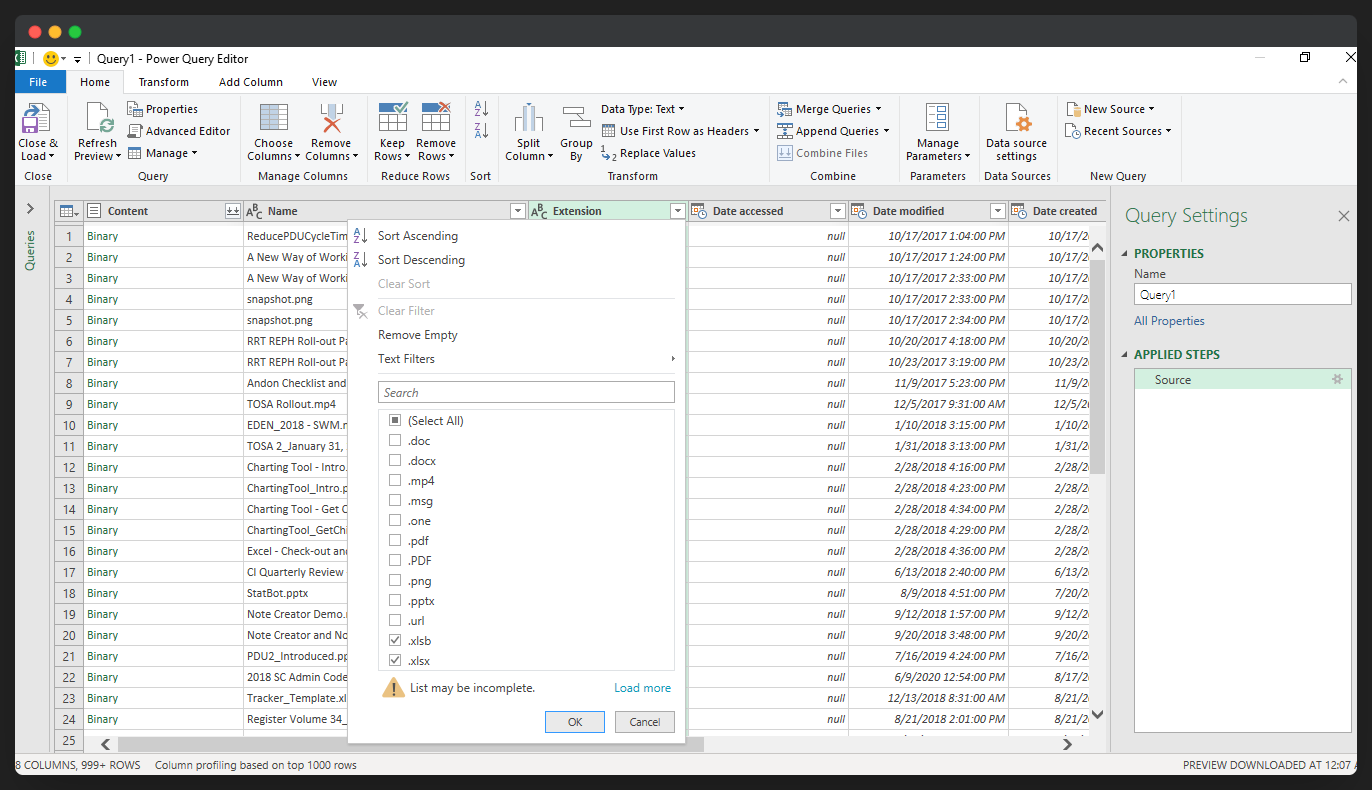
Step 4.
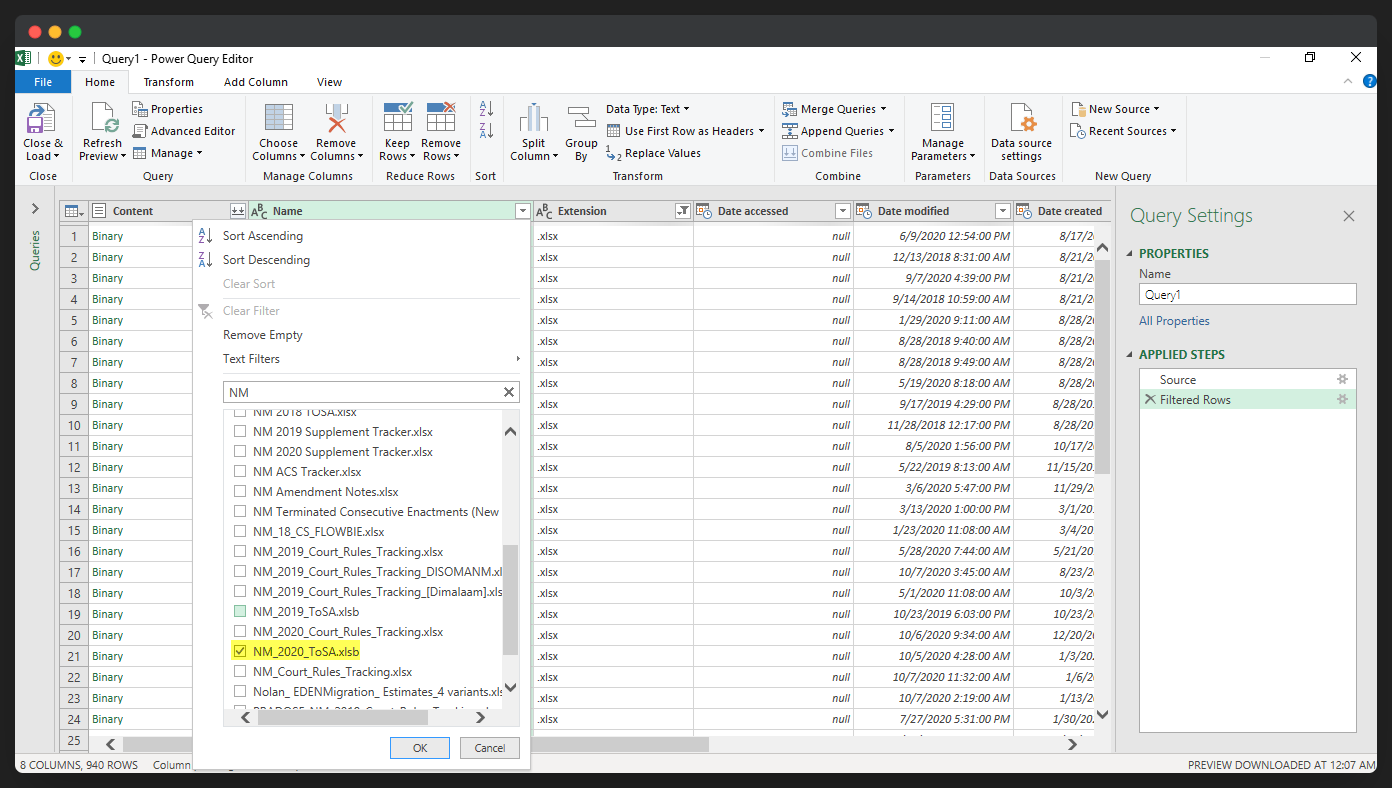
Power Query Editor window will open. In the Extension column, select only .xlsb or .xlsx to narrow our search.
Power Query Editor – Extension column: as our data source gets bigger, we need to click on “Load more” to make sure we can see all available formats since the .xlsb and .xlsx files are usually at the end.
Click to enlarge
Step 5.
From the Name column, select the JX TOSA, then click OK.
Click to enlarge
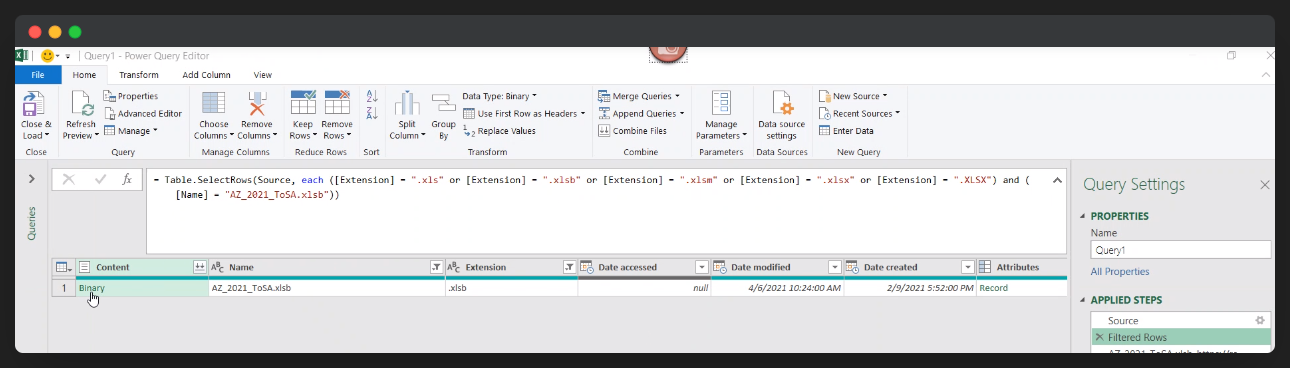
Step 6.
In the Content column, Row 1, hover on the word “Binary” until you see a pointing finger cursor and left-click on it.
Click to enlarge
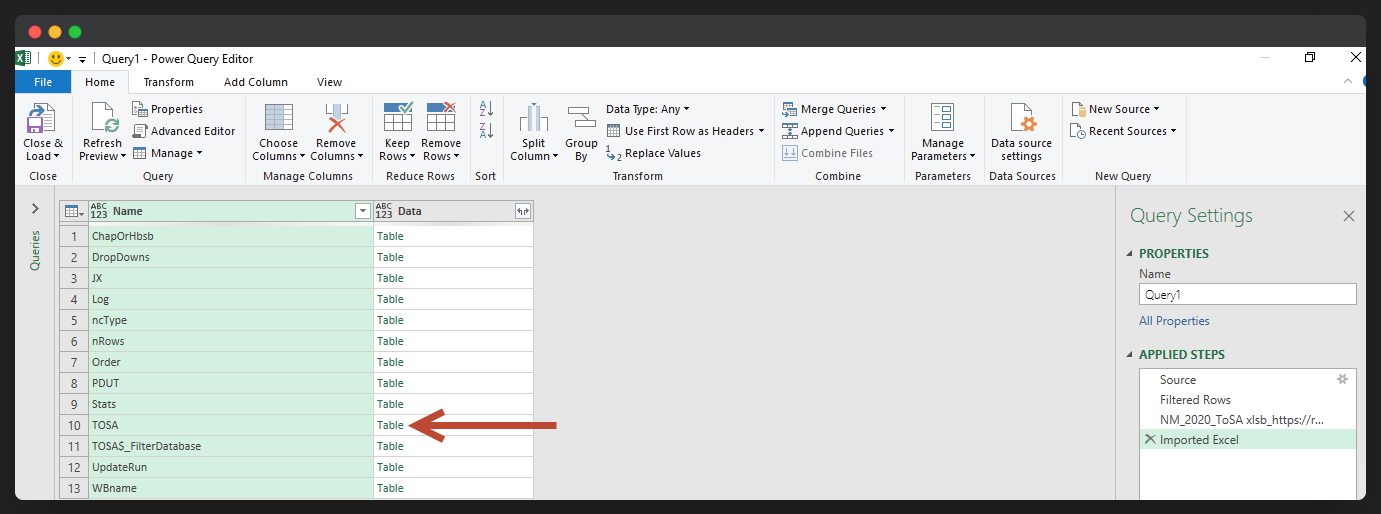
Step 7.
Look for the TOSA under Name Column and in the Data column, hover on the word “Table”.
Click to enlarge
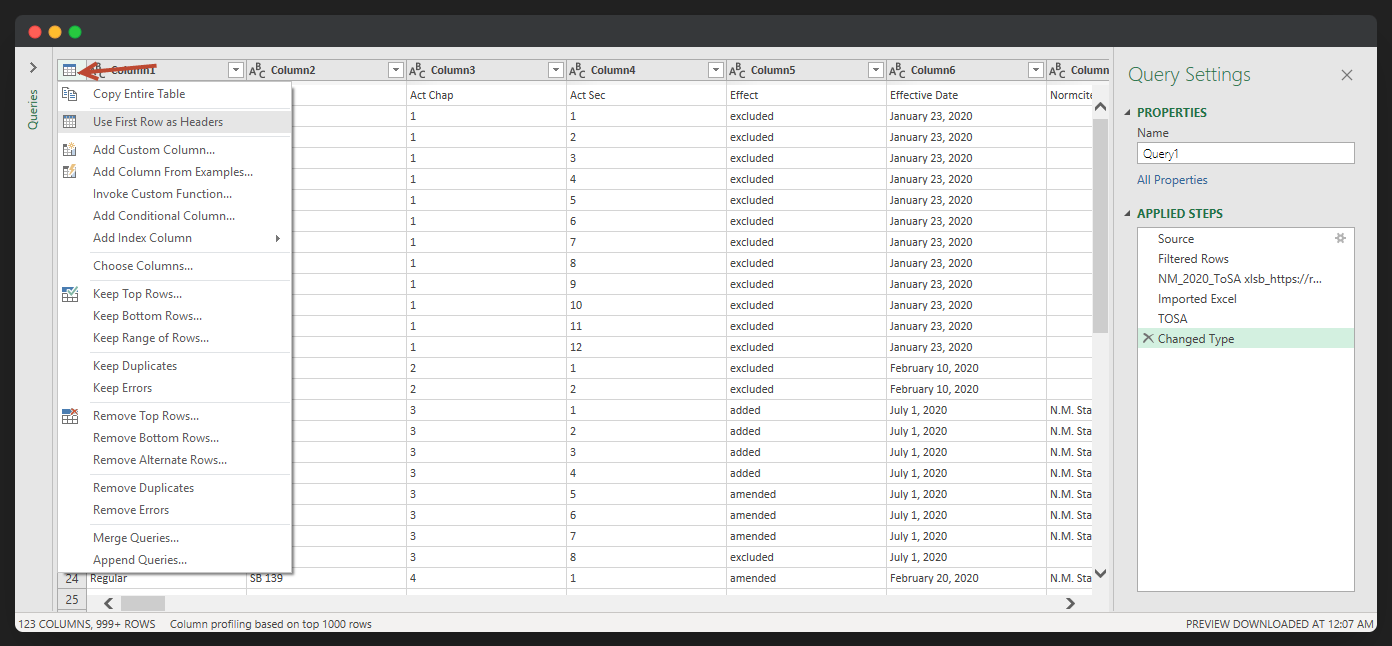
Step 8.
Click the Table icon, from the dropdown menu, click on Use First Row as Headers.
Click to enlarge
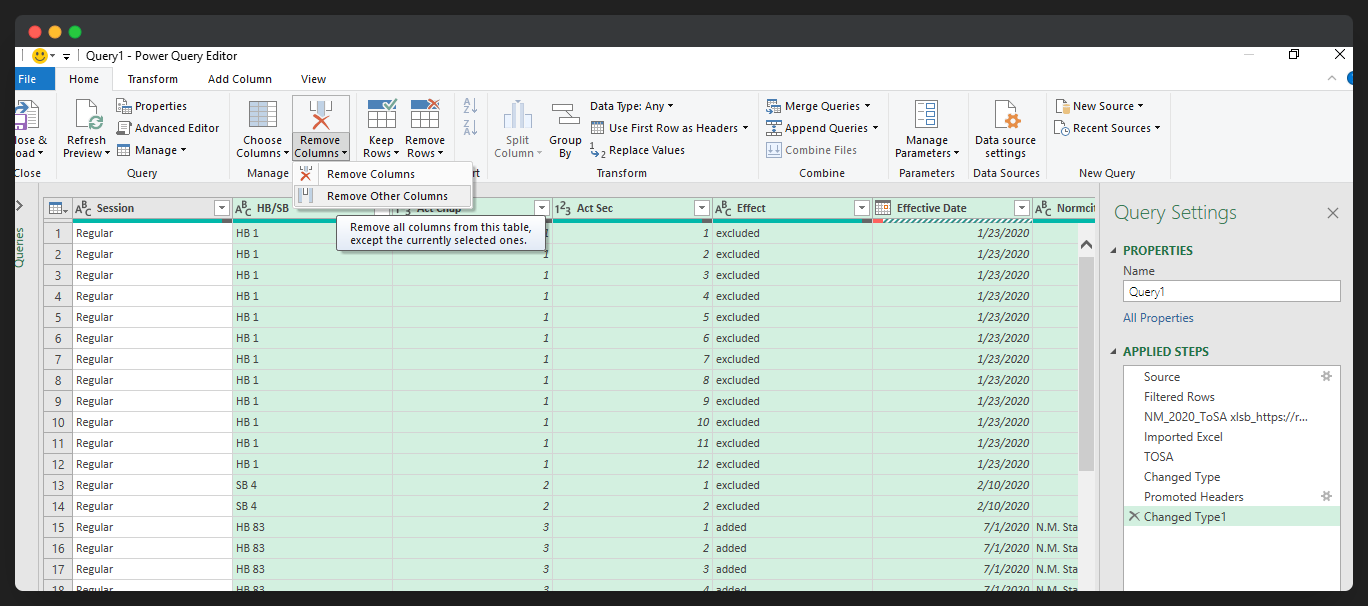
Step 9.
Select the necessary columns (may differ for other JXs): HB/SB, Act Ch, Act Sec, Effect, Effective Date, Normcite, and As Entered Order. Then click on Remove Other Columns to keep only the selected columns.
Click to enlarge
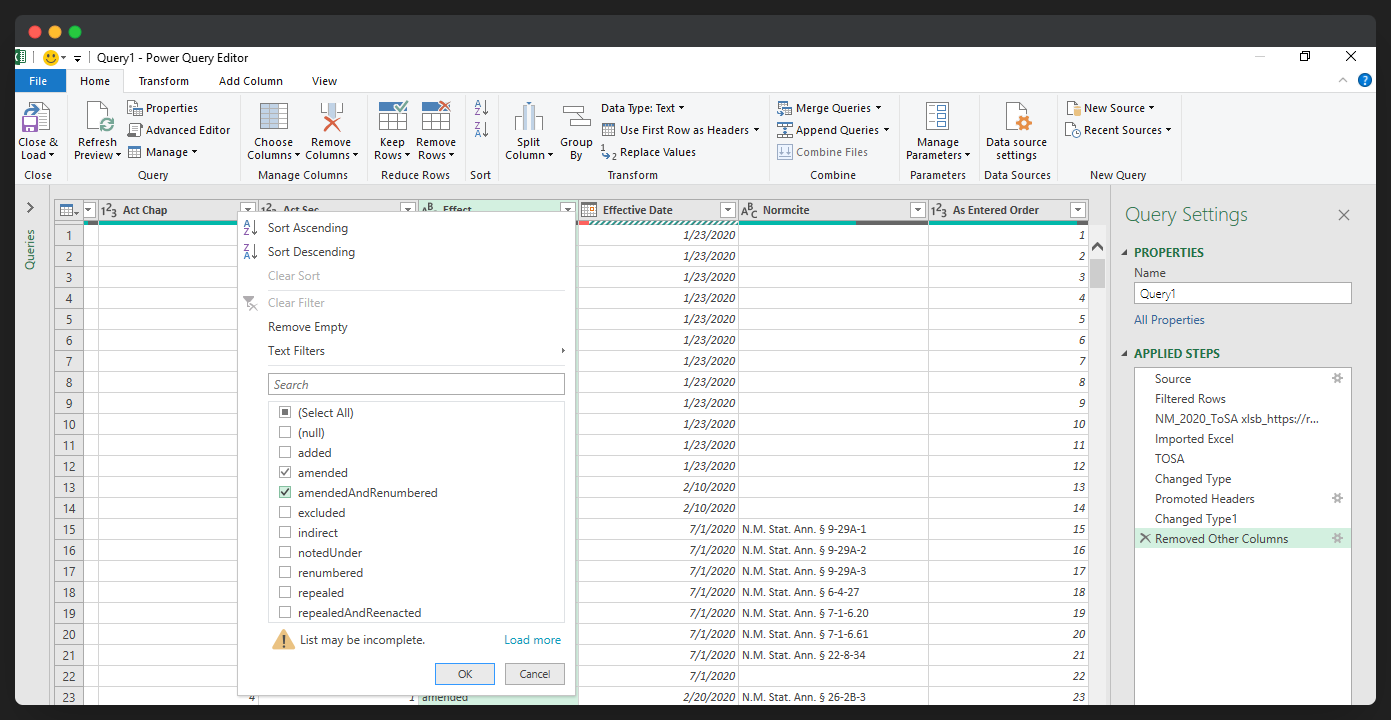
Step 10.
In the Effect column, we will filter and select only amended and/or amendedAndRenumbered.
Click to enlarge
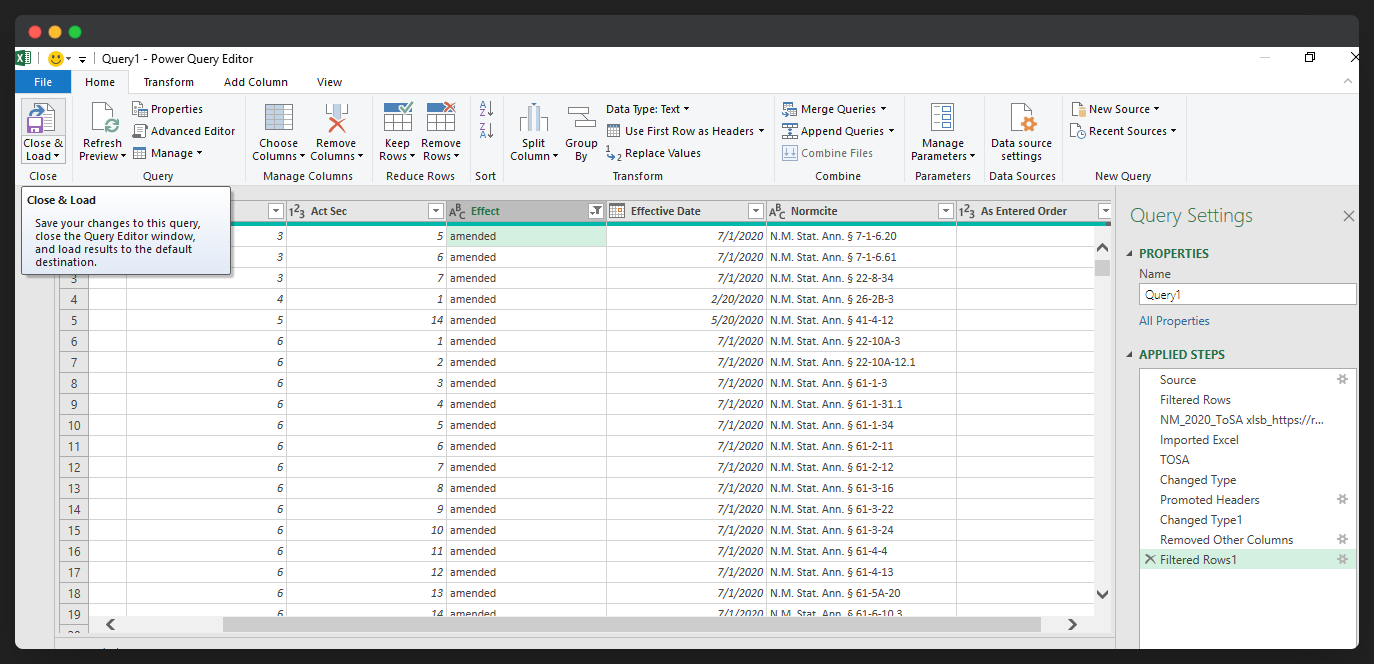
Step 11.
As Entered Order should be automatically arranged from lowest to highest.
Click Close and Load
Click to enlarge
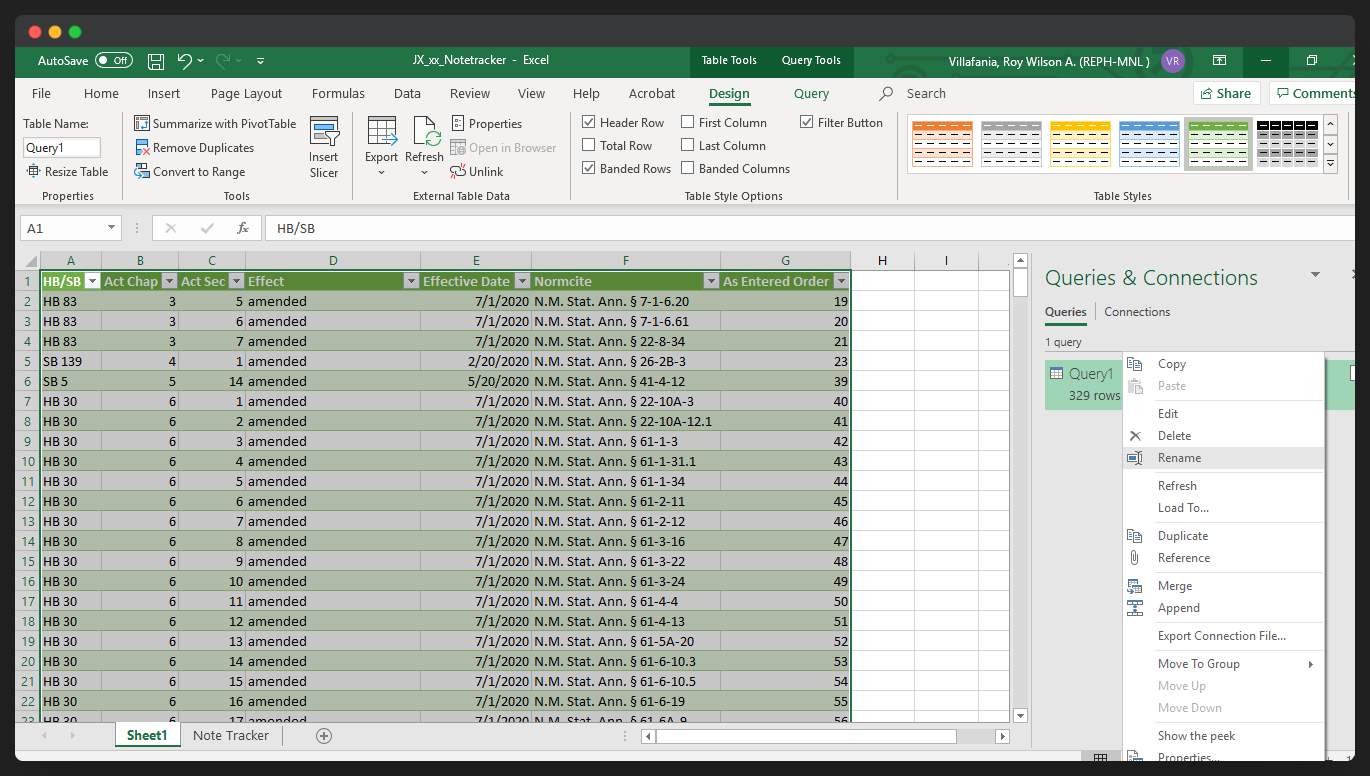
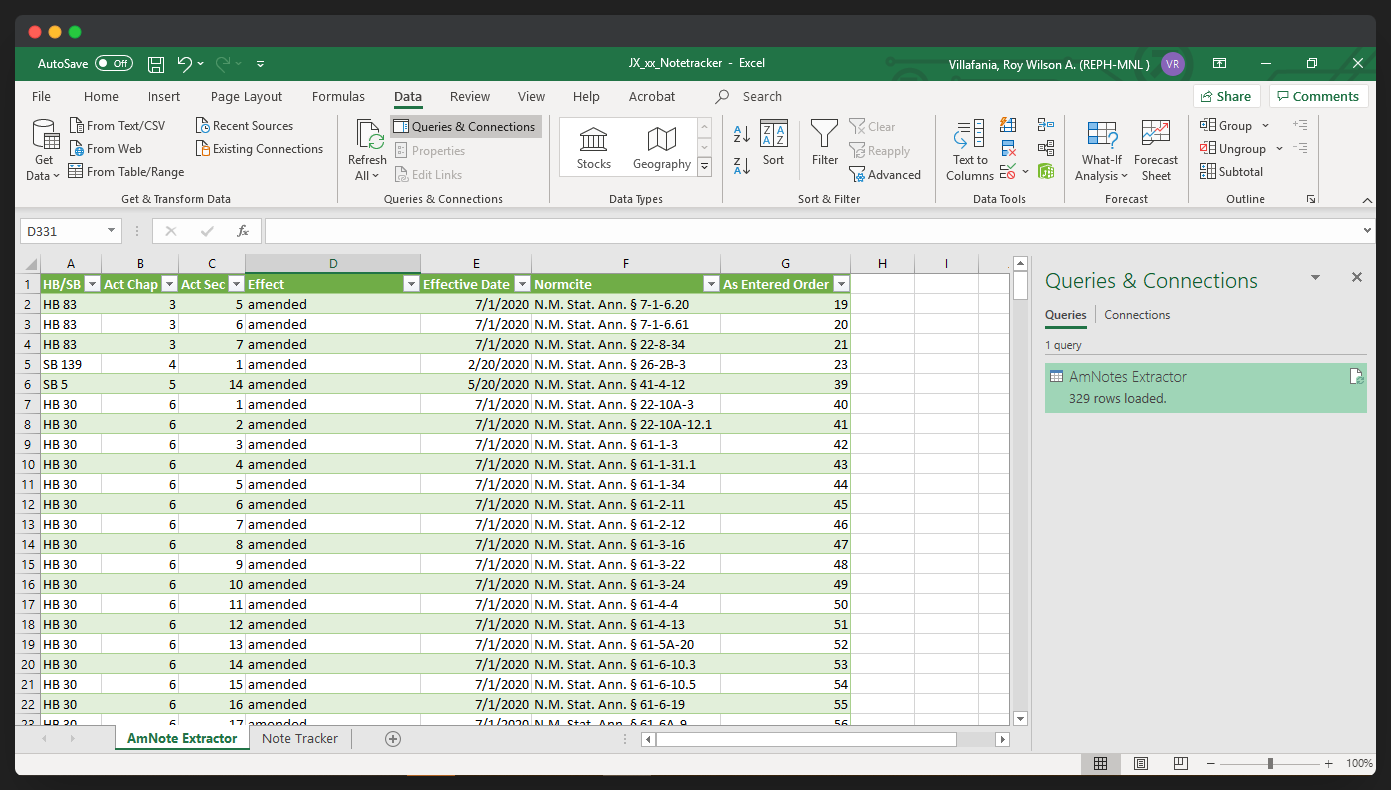
Step 12.
The data connection will be established, and the selected columns will be extracted from the TOSA.
Rename the sheet and Query1 as AmNotes Extractor.
Click to enlarge
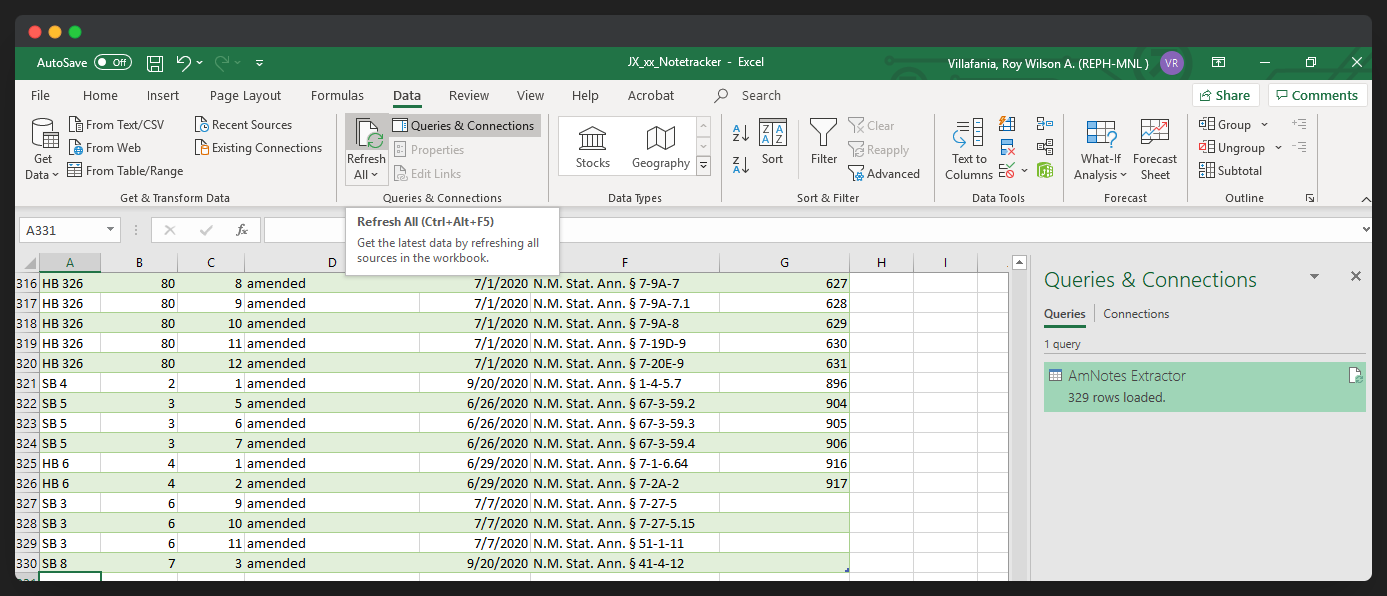
Step 13.
Get the latest data by clicking on Refresh. The latest data should appear after the last row.
Click to enlarge
Step 14.
Copy the latest data from the AmNotes Extractor sheet to the Note Tracker.
Click to enlarge
For the introductory language, copy the formula for your respective jurisdiction then paste it in I2.
AK
AL
AZ
CA
CT
FL
HI
IA
IL
IN
KS
LA
ME
MI
MN
MO
MT
NE
NH
NJ
NM
NV
NY
OH
OK
OR
PA
SC
TX
UT
WA
WI
WV
WY
RSV
RSV
For notes placement, there are two options: Standard or w/ SubType Heading.
Most jurisdictions usually use the Standard XML tags. But if a jurisdiction (e.g. CA) needs a SubType Heading, copy w/ SubType Heading and paste it in P2.
Standard
W/ SubType Heading
The following are the common errors during notes placement:
Unable to complete an NCD job. Error message: Missing LNI. Fix by saving the changes to generate the LNI for newly placed notes.
Unable to paste notes from the Note Tracker to NCD job. Look for a line break or hard enter in the note/s (Column J) and delete it.
For any concerns regarding this project, kindly reach out to your respective supervisors, project coordinators, or POCs. Alternatively, you may directly reach out to us via MS Teams or Email:
- Aldrin Renz Cruz | ---------------------------
This project is constantly being improved as we gather more information from user experience and feedback. If you've found any bugs or errors, it will help us immensely if you'd let us know about it. Suggestions are very much welcome!
| # | Edited By | Date Edited | Comments |
|---|---|---|---|
| 3 | Aldrin Renz Cruz | December 1, 2021 | Revision of document content and structure |
| 2 | Aldrin Renz Cruz, Roy Wilson Villafania | January 25, 2021 | Addition of Extractor; updated formulas |
| 1 | Aldrin Renz Cruz | September 12, 2020 | Document created |